Mod Description
The foglights on the fortwo 451 are much better than the old fortwo foglights.Mod Details
PremiumYes Difficulty


 Mod ID276
CreditEvilution
Cost££30+
For
 Linkhttps://www.evilution.co.uk/mod/fitting-451-foglights.htm Copy to Clipboard
Warning
Most cars cannot have the fog light fitted due to a relay missing from the SAM unit. The fog lights do not need to be coded. If the relay is there, the fog lights will work. If the fogs don’t work, you don’t have the relay.
How Can I Tell?
If you wire up the fog light button, you can turn on the headlights and press the newly added fog light button.
Listen out for a clicking sound from the fuse box. If you hear a click, you have the relay.
If for some reason you have MB Star Diagnostics, you can just use it to toggle the relay and check.
Can You Add The Relay
You can and I have, however, the fog lights still don’t work but can be turned on and off with MB Star diagnostics. There are 5 other (tiny) missing components that need to be added to the SAM unit.
Buying The Foglights
The smart foglights are standard throughout many Mercedes models. Despite being sold by smart for over £70 each and most Bosch resellers selling them for about £45 each, they are relatively easy to buy second hand. I got these ones from ebay for £15 including delivery. You can buy pattern copies brand new for less than £25 if you look.
Smart part numbers are A251 820 08 56 and A251 820 07 56.
Bosch part numbers are 0 305 076 002 and 0 305 076 001.
Don’t narrow yourself to part numbers when searching as not many people know which numbers to put on Ebay and other websites. There are quite a few numbers on the lables of both units so it’s easy to get the information wrong.
You know what they look like from the pictures below.
Go to Ebay and type in Mercedes Fog. Scan through the results to find them.
Fitting Foglights
Remove the front panels as seen here. Either side of the radiator you will see a wiring connection.

Plug it into the foglight.

Put the foglights in place so the locating pins sit in the correct holes.

Screw it to the car using the fixing pack (smart part number MN000000 003242).

The foglights will now be attached to the car.

Look at the back of the front panel, you will need to remove the blanking panels. They are just held in with clips all the way around.

Unclip all the clips and push it out.

Fit the replacement surrounds with the pre cut holes. (part numbers SA451 826 01 18 and SA451 826 02 18).

Refit the front panels. Look at the button adding mod (seen here) or fit a new button bank.
Check to ensure that you have the correct wire going to your button bank. Look for a Blue/Yellow wire going to pin 8. If it’s not fitted, it may be taped up somewhere. If there is no wire, you’ll need to add a wire from SAM plug 9, pin 13 to the button bank pin 8.
Activation
If your car was made from 2011 onwards and the fog lights work, you can get them coded to control daytime running lights. However that does also require a wiring adapter and new lights.
Warning
Most cars cannot have the fog light fitted due to a relay missing from the SAM unit. The fog lights do not need to be coded. If the relay is there, the fog lights will work. If the fogs don’t work, you don’t have the relay.
What Components Are Needed?
Parts List
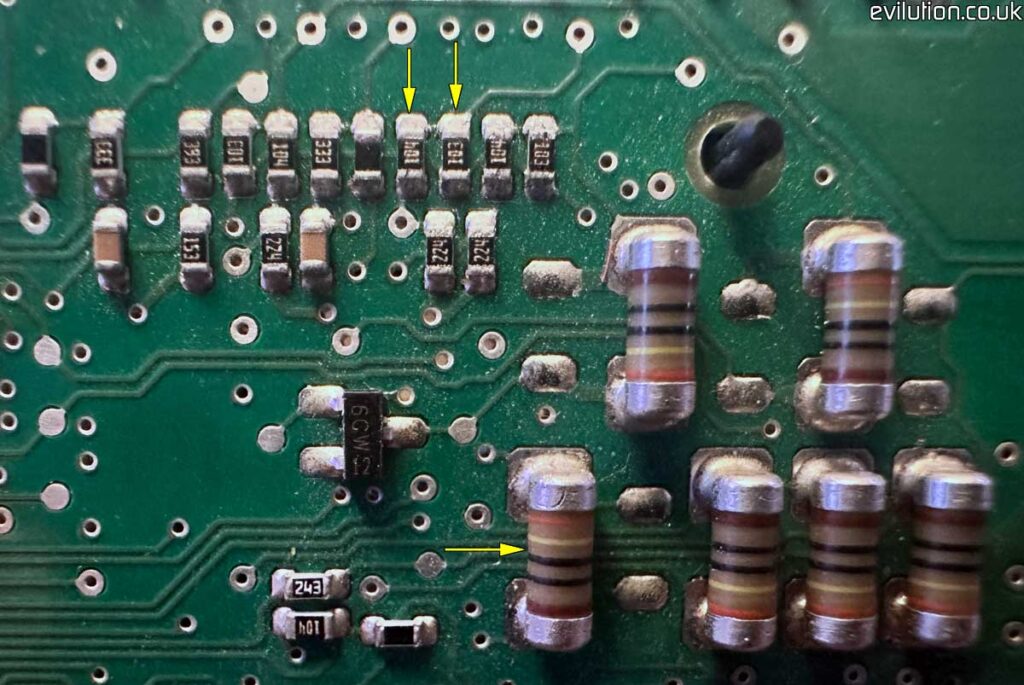
1. MELF Resistor 1% 340ohm
2. Resistor SMD 0603 103
3. Resistor SMD 0603 104
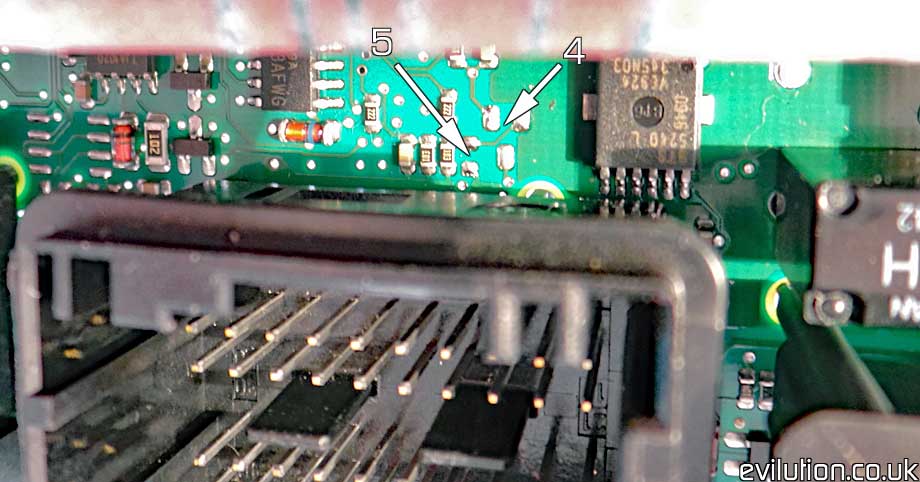
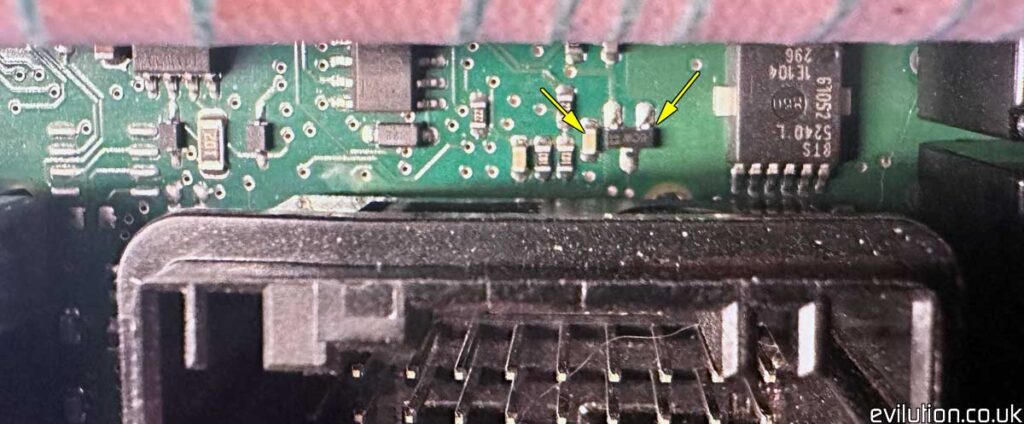
4. NXP BC817-40 SOT-23 6c
5. Capacitor SMD 0603 10nf
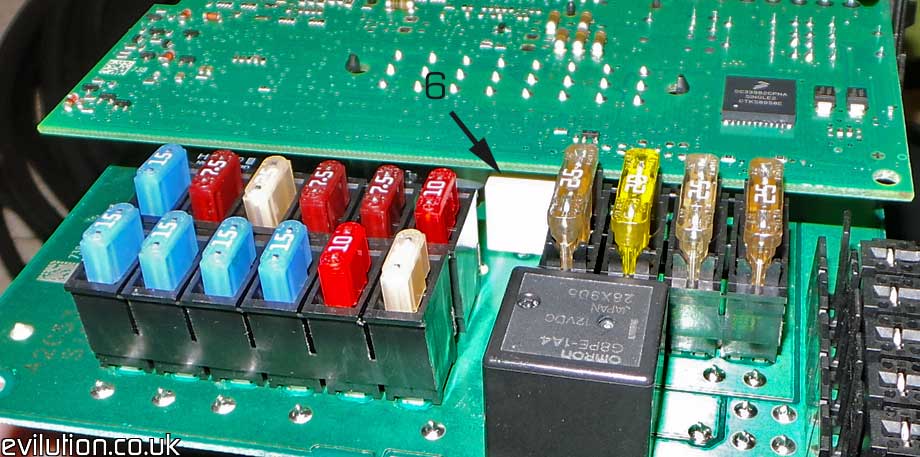
6. Relay 51nd10-w1
Where Do The Components Go?
This is the back of the PCB that has the pair of 40 pin connectors.
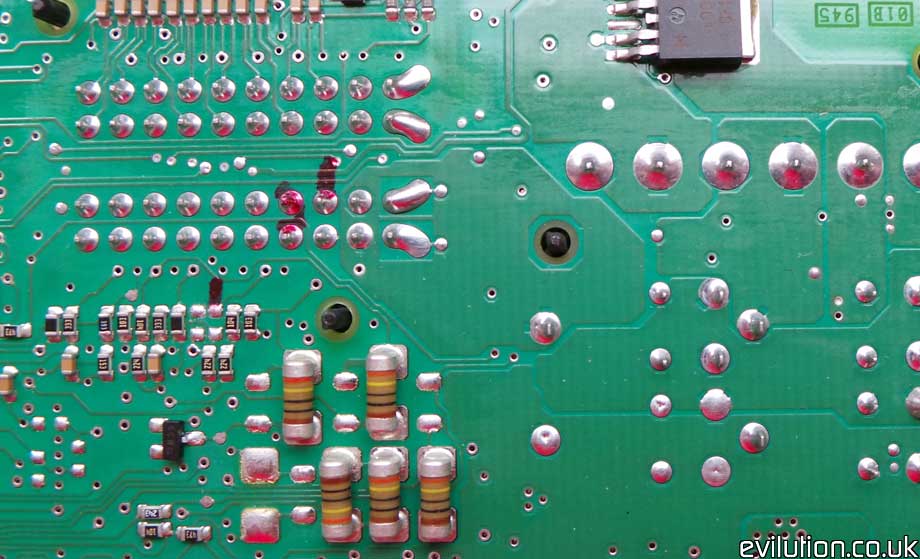
Zoom in for components 1, 2 and 3
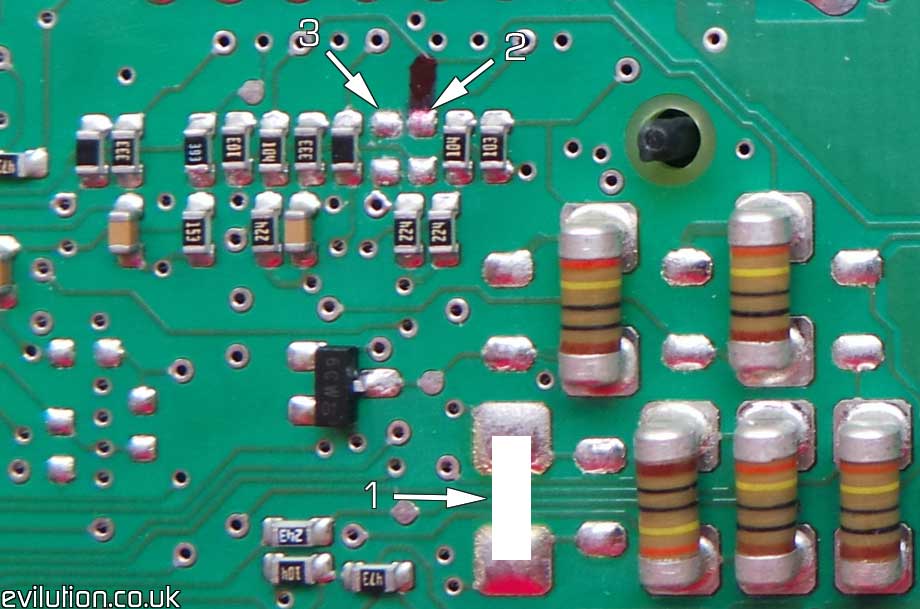
Here is a SAM unit that has the components.
Hidden behind the 40 pin connector N11-9 are the spaces for components 4 and 5.
And here is the same area on a SAM with the components. (Some components look different and can be in slightly different positions).
Between these 2 boards is where components 6 lives.
Fold the PCB open to see the solder joints on the back. You will have to heat these 5 points up to clear the through holes.
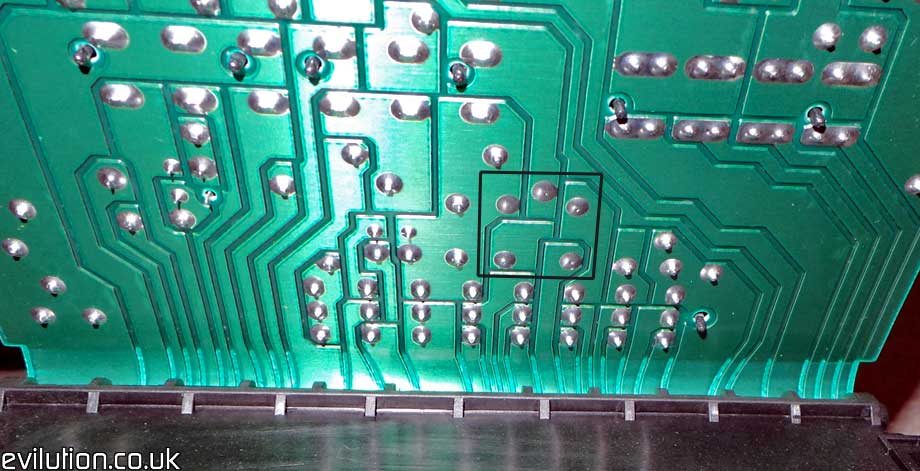
Because the PCB is a large copper plate, getting enough heat into the board is very hard.
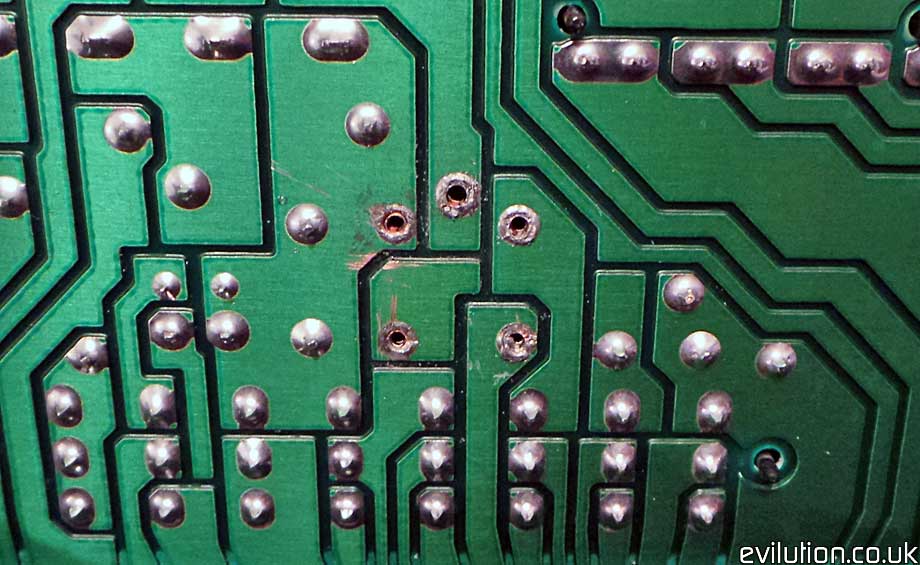
If I had to do it again, I would probably drill through the solder points instead.
Good luck, you’ll need it.


