Mod Details
PremiumNo Difficulty


 Mod ID1698
Creditevilution
For
 Linkhttps://www.evilution.co.uk/mod/451-headlight-issues.htm Copy to Clipboard
The Headlight Aims Down And Won’t Adjust Up
This is very common on the 451 fortwo. The projector becomes loose inside the headlight and because the front of the projector lens is the heaviest part, the dipped beam will aim too far down and no amount of adjustment will make it move.
The Bosch projector is screwed into a horseshoe shaped piece of plastic…
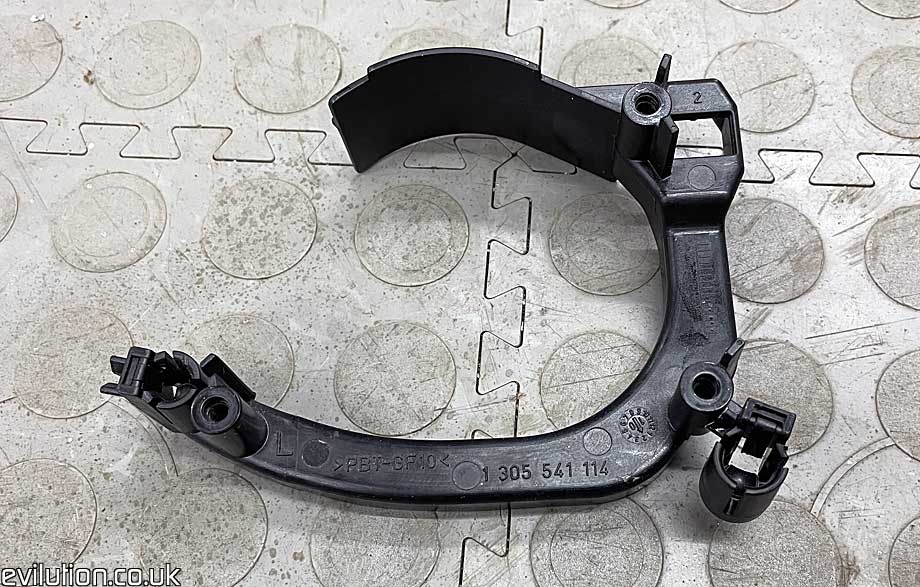
…and this is clipped into the headlight housing at 3 points. 1 fixed point and 2 adjustable points. 1 point adjusts the uppy-downy and the other adjusts the lefty-righty.
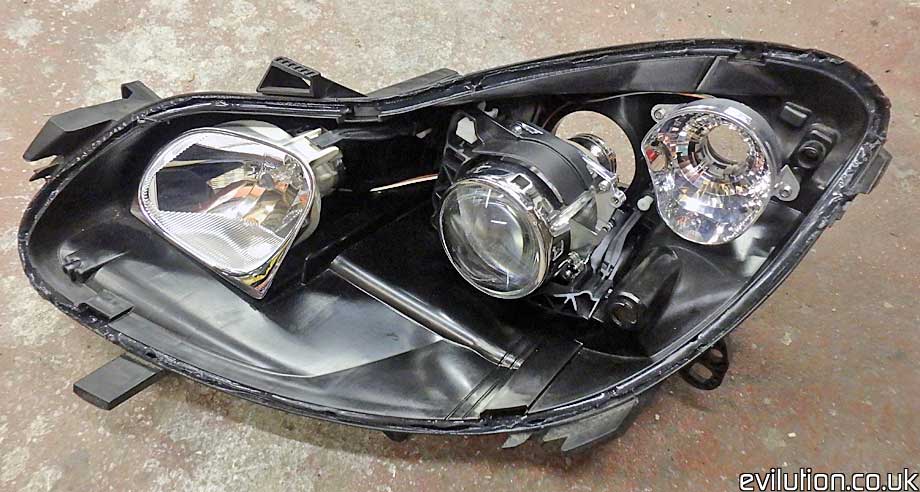
The problem is the fixed point which can be seen in the bottom right corner.

The issue should be obvious just by looking at it. Look how badly this part is joined to the horseshoe.
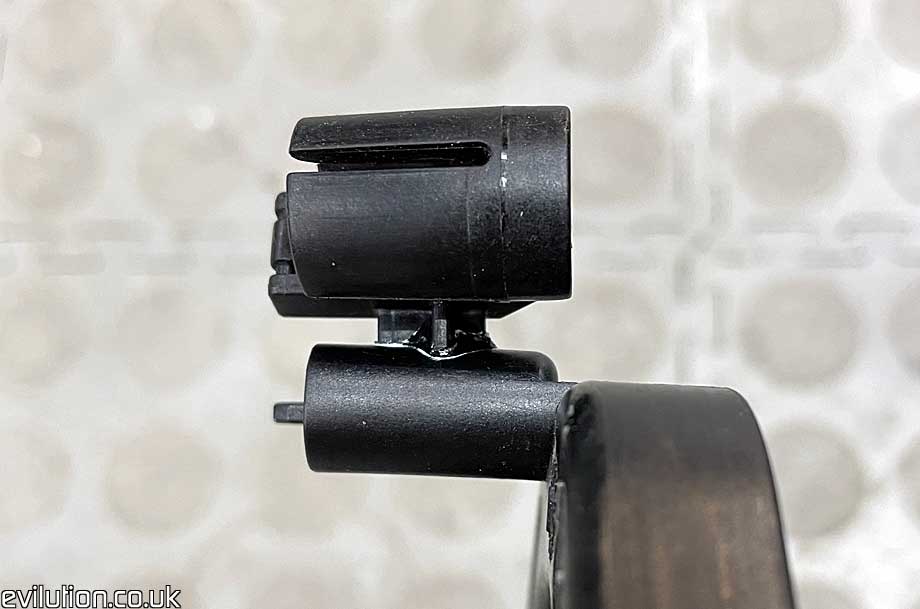
It’s no wonder that the heat, weight and vibration experienced causes this part to snap off.
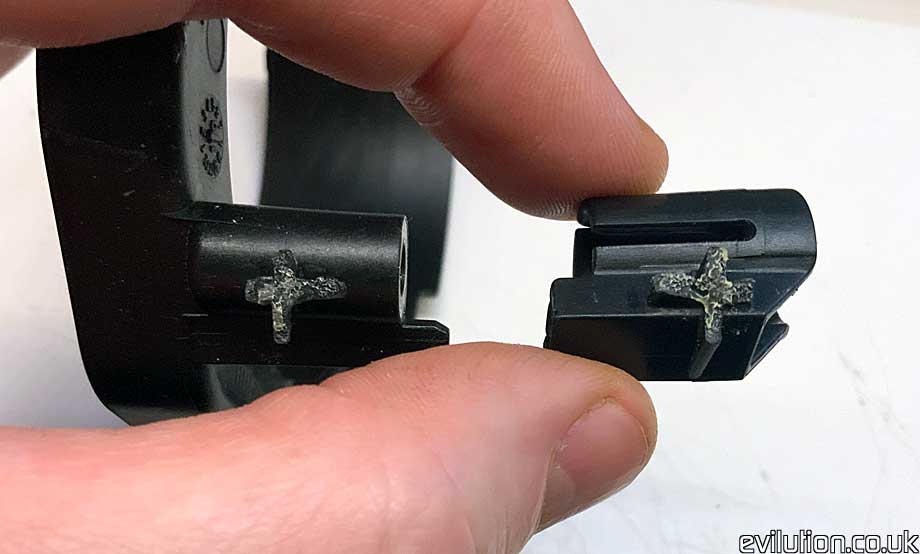
You can super glue it back on if you want to be repairing it all again the following weekend.
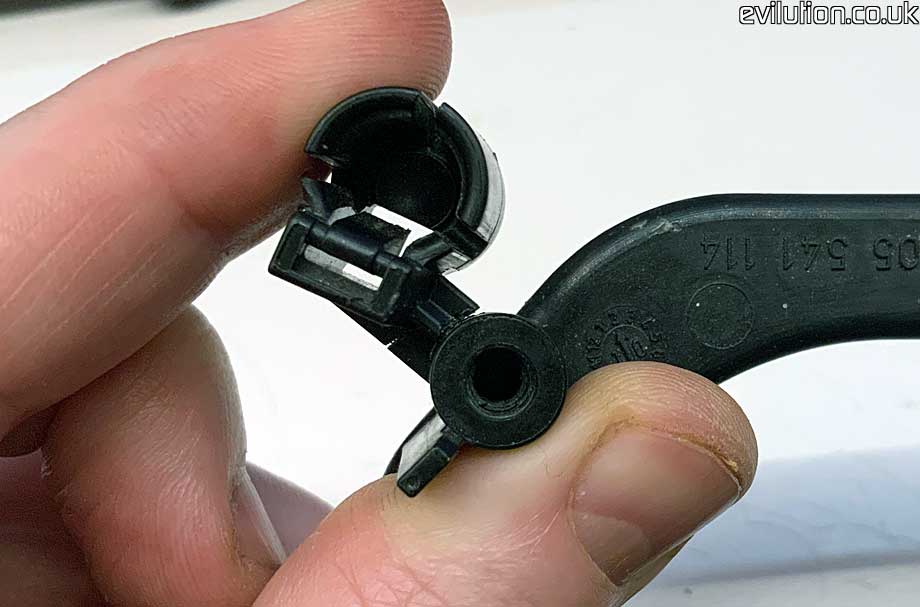
I used an epoxy to increase the surface area between the 2 parts. Sand all the parts that the epoxy will touch to increase adhesion.
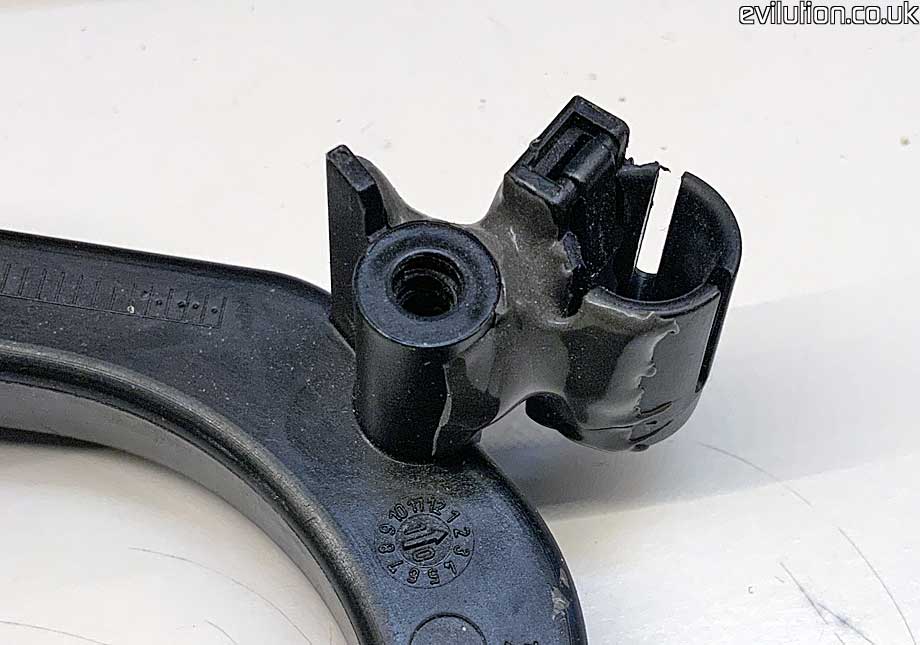
It does work but it’s not ideal however, it should last you at least a year if done properly.
Better Repair Options
If I was doing this repair again I would use a hot staple repair tool. Sometimes called a plastic welder. This is reasonably demonstrated in the following video although Chinese copies are available cheaply and do just a good a job.
A Quick Bodge Repair
Let’s be honest, this is what you are here for. I offer you a proper repair but what you really want is something quick and easy that works, no matter how shady the repair is. Well, good news. I used the following bodge repair on a 451 that I used every day and it worked flawlessly for over 3 years. It worked so well that I never actually repaired it properly.
Go to the kitchen. That’s the room your Mum hangs about in with the cooker. Look through the cupboards until you find the tin foil (or aloominum foil as you Yanks call it).
Make a loose sausage shape and wedge it between the top of the bulb base and the headlight rear aperture.
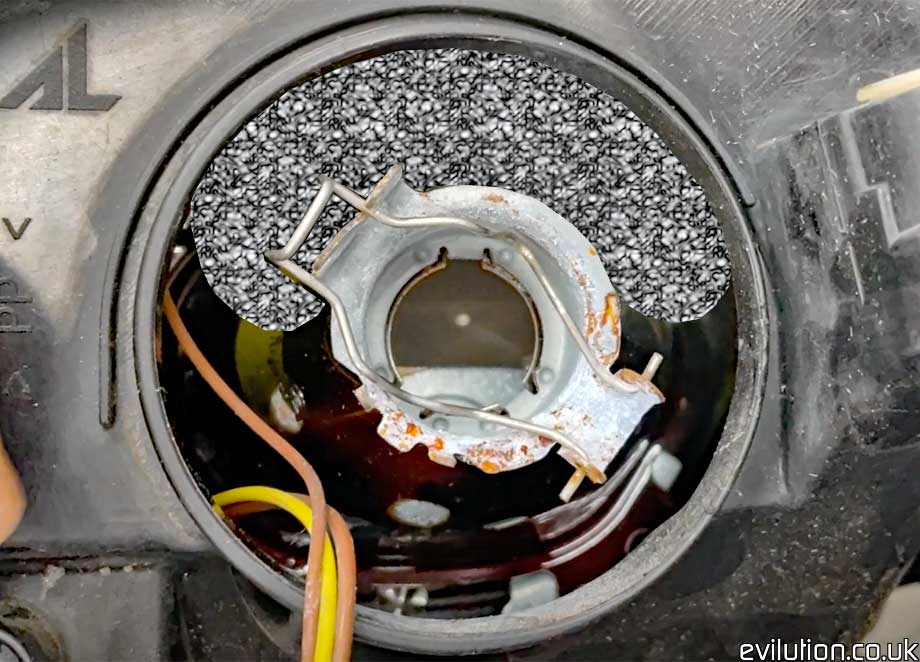
Shine the headlights against the side of a building so you can see the line made by the working headlight. Manually pull the bulb holder upwards to compress the metal sausage until the cut off line of the bulb is correct and matching the good side. Replace the rear rubber cap and that’s it, you’re done.


