Mod Details
PremiumNo Difficulty


 Mod ID1751
Creditevil/Martin
For
 Linkhttps://www.evilution.co.uk/mod/450-abs-water-ingress.htm Copy to Clipboard
History Of The Fault
Back in early 2000’s, a smart specialist posted in a forum stating that there was an issue with the 450 fortwo ABS system. They said that over time, the ABS controller would fail. It was their recommendation that owners brought their car to their workshop and paid them for the mystical fix. People generally didn’t.
We were warned that it would become a massive issue for all smarts and that repairing the damage would be incredibly expensive.
Turns out they were half correct. It is expensive but it wasn’t an especially common occurrence. There were a few people with the issue at first and then almost nothing for nearly 2 decades. Chances are that it was still happening albeit rarely.
However, now that the 450 is an ancient model, we are starting to see a resurgence of the fault due to dried out seals.
ABS Unit
The ABS (Antilock Braking System) unit is underneath the car on the driver’s side because it’s attached to the base of the brake pedal. To view it, you ideally need to lift the car, secure it safely and remove the under tray.
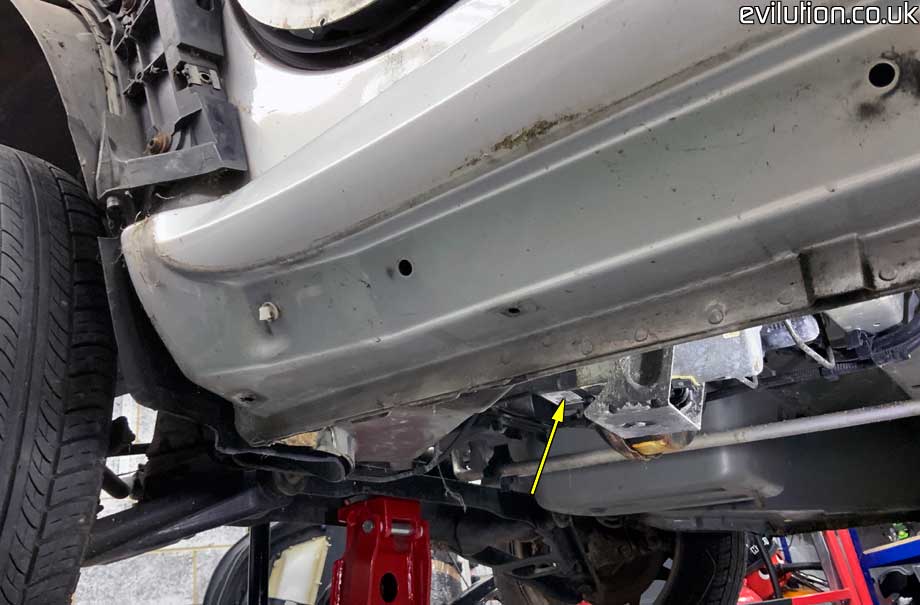
The ABS unit looks like this. It’s a pump, a bank of valves and an electronic controller packed into 1 unit.
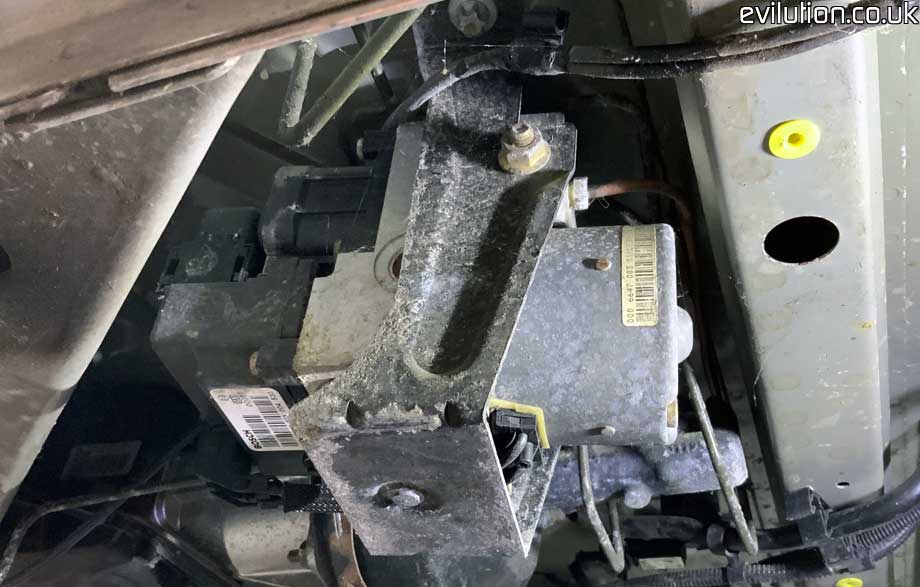
It’s bolted to the underneath of the car with a 2x Torx E12 bolts…
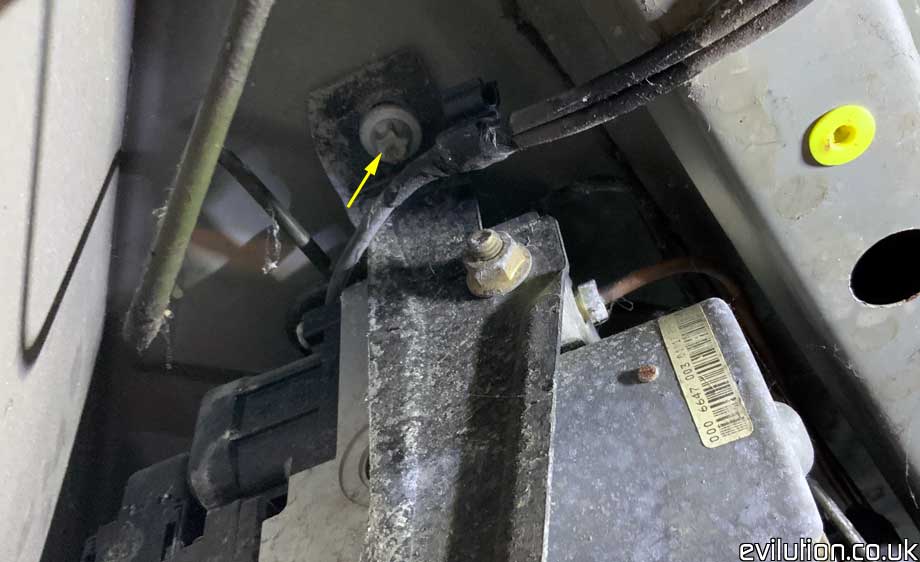
…and it has a bunch of copper pipes sprouting out the top. These connect to the front brake callipers, rear brake pistons and the brake master cylinder. You do not need to disconnect any of these pipes and I recommend you don’t.
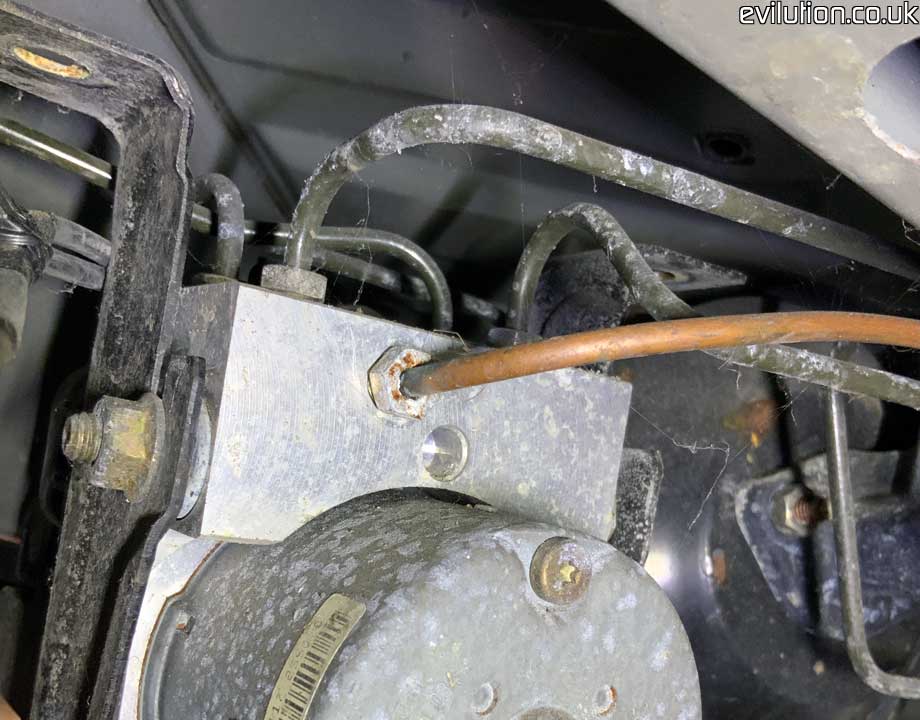
On the front edge of the ABS unit is the electronic controller and the electrical connection. This is the general issue found with this unit.
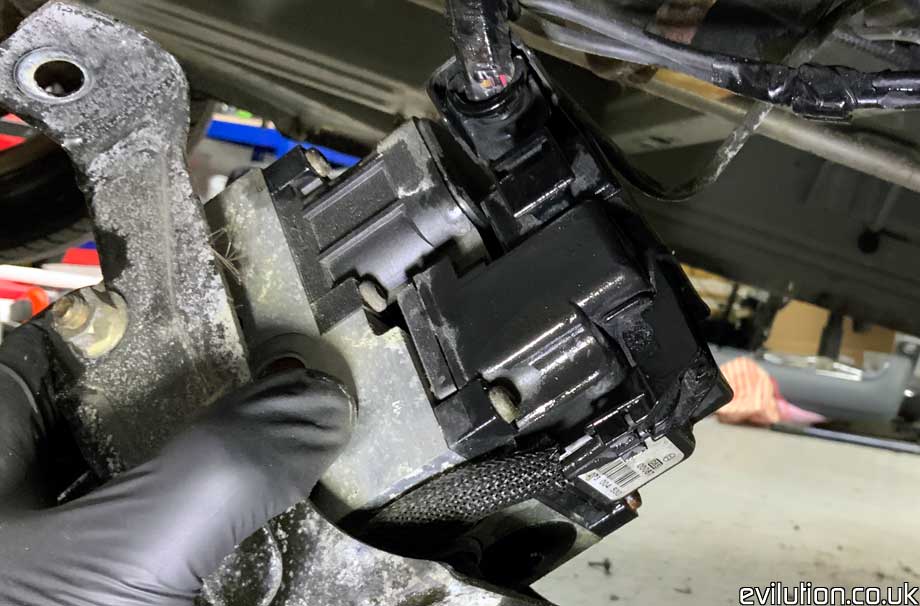
You don’t need to lower the ABS unit to disconnect the electrical connector but it does make it easier to look into the socket once you’ve disconnected the plug. The plug has a slide that pulls out sideways to unlatch it from the unit.
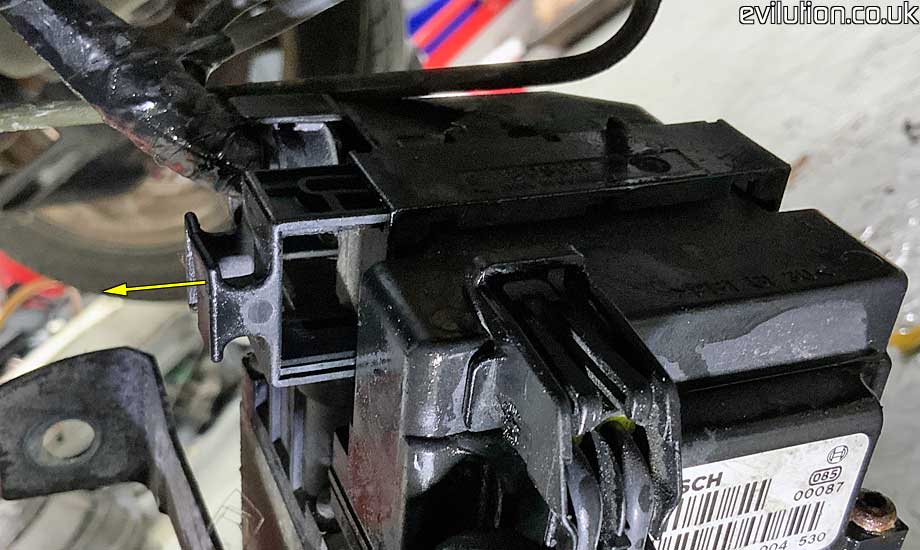
You can then lift the connector upwards to fully disconnect it.
Now look at the photo below. That it the orientation when fitted to the car. So, unless the electrical connector seal is working perfectly, that socket acts as a bucket that water cannot escape.
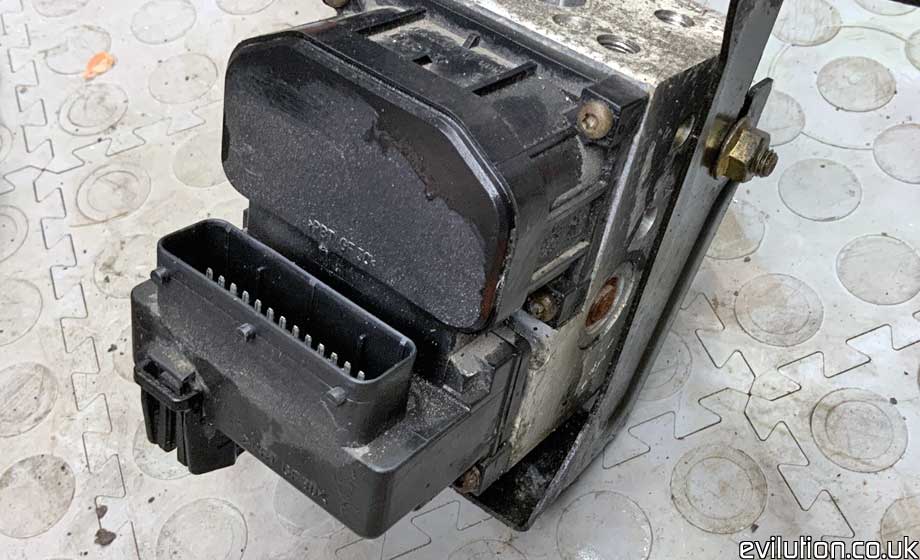
1 of 3 things will happen. Either the wire surround grommets or the wire blanking grommets in the plug will fail and let water passed, or the perimeter seal of the plug will fail and let water passed. Rubber doesn’t stay malleable for ever, that’s what you can only use a condom a few times before you trade it for a refurbished one.
Once the water has made it into the socket, 1 of 3 things will happen.
1 – Water will cause a short circuit between connections that should be connected.
2 – Water will seep passed the pins in the socket of the ABS controller and it’ll fill up, causing more short circuits.
3 – Water will corrode terminals in the connector, eventually causing bad or missing connections.
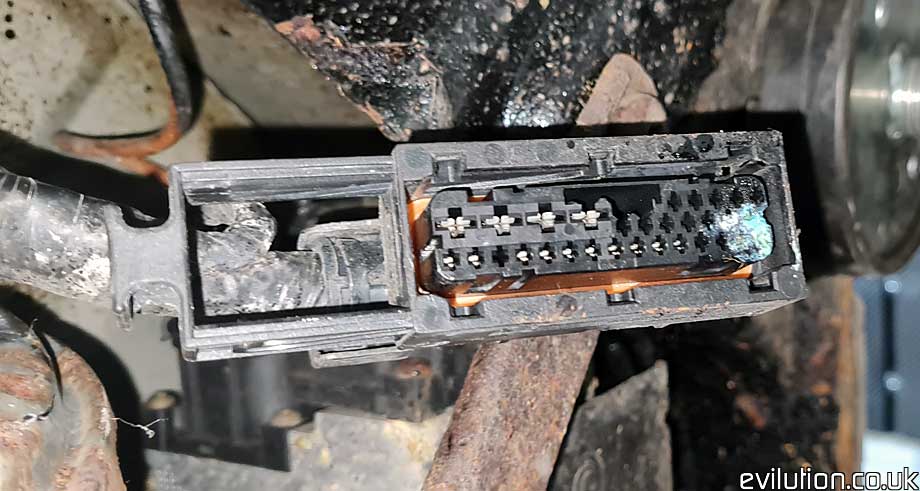
This is what happened to Martin H who sent this photo. You can see that corrosion has turned the copper contacts into the finest quality green dust.
Symptoms
You may have 1 or more of these signs.
1 line on the speedo (CAN Bus fault).
Rev counter drops to 0 when the brake is applied.
Will not select gears.
Flashing traction control light /!\
Fuel gauge and coolant temperature gauge flashing.
Power loss whilst driving with traction control light showing.
Fix
This really depends on the damaged caused.
1 – If water has got into the pump controller, you’ll need a replacement ABS unit. As far as I know, you can fit a 2nd hand unit.
2 – If water has corroded the pins of the unit or the terminals of the plug, you can use vinegar to clear up the area. You can flood the affected area and leave it or agitate it with a tooth brush, interdental brushes, cotton buds etc. Clean up the area with electrical contact cleaner spray.
3 – If the pins of the ABS unit have corroded to nothing, you’ll need a replacement ABS unit.
4 – If the terminals in the connector have corroded beyond repair, you have 3 options.
A – Remove the damaged terminals with a terminal remover and soldering in replacements.
B – Buy a 2nd hand wiring loom and replace the entire affected loom or splice it into the existing loom or remove some of the good terminals and swapping them for the bad ones and splice those in.
C – Buy a repair loom from smart (assuming it exists and available), It’ll be a connector with a length of wire connected to each terminal. Again, you’ll have to splice it in.
Double Protection
Now, there’s no point in doing all of this work just to let it happen again some time down the line.
So, it’s a good idea to put dielectric grease into the plug and socket. If you take up all of the air in the connector, water can’t displace the grease. Don’t over-pack the socket as the seal of the connector could push the grease into the connector and possible push some of the rubber bungs out where there are no cables.
Retrospective Fix
Of course it’s better to not have the issue in the 1st place so it’s a good idea to put dielectric grease into the plug and socket to protect the pins and terminals from water ingress and corrosion. Don’t over-pack the socket as the seal of the connector could push the grease into the connector and possible push some of the rubber bungs out where there are no cables.


