Mod Details
PremiumNo Difficulty![](https://www.evilution.co.uk/wp-content/themes/evilution/images/evilution/menu-normal-off.png)
![](https://www.evilution.co.uk/wp-content/themes/evilution/images/evilution/menu-normal-off.png)
![453 EQ 453 EQ](https://www.evilution.co.uk/wp-content/themes/evilution/images/evilution/model3950.png)
![453 Fortwo/Forfour 453 Fortwo/Forfour](https://www.evilution.co.uk/wp-content/themes/evilution/images/evilution/model8.png)
Smart Audio System
This is the basic stereo found in the 453.
![](/wp-content/uploads/smartsound/453/stereoremove/audioremove1.jpg)
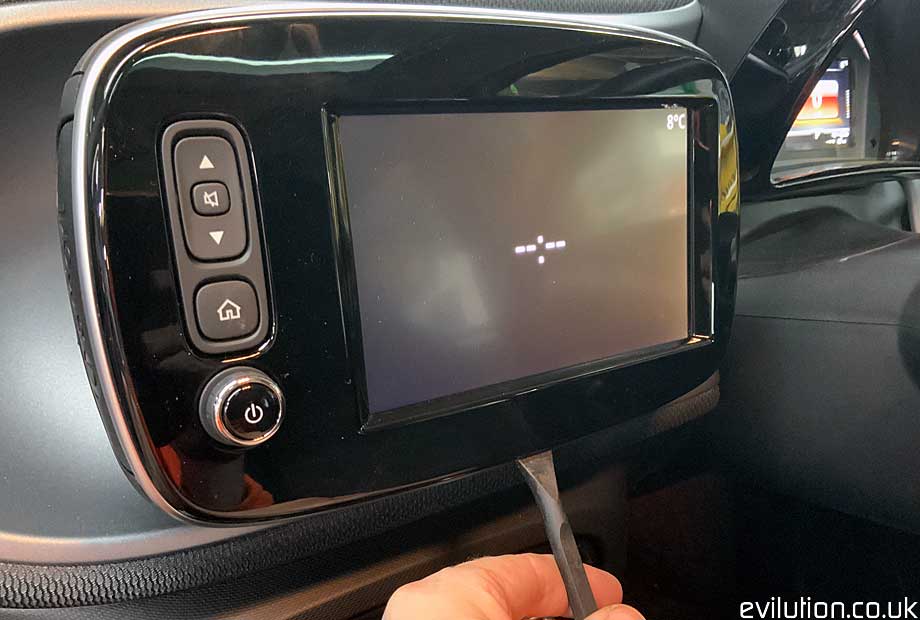
Take a plastic spudger and jam it in between the black cowel and silver band.
![](/wp-content/uploads/smartsound/453/stereoremove/audioremove2.jpg)
Work all the way around from 1 side, underneath and to the other side to disconnect all of the clips. Lift the bottom to disconnect the top hooks.
![](/wp-content/uploads/smartsound/453/stereoremove/audioremove3.jpg)
There are a few clips. Pay close attention to the top hooks.
![](/wp-content/uploads/smartsound/453/stereoremove/audioremove4.jpg)
You are now left with the stereo uncovered. Remove the 4x Torx20 screws.
![](/wp-content/uploads/smartsound/453/stereoremove/audioremove5.jpg)
The stereo can now slide out and the 3 electrical connections can be disconnected.
![](/wp-content/uploads/smartsound/453/stereoremove/audioremove7.jpg)
The stereo is an awkward design that seriously limits the aftermarket stereos that we can fit instead.
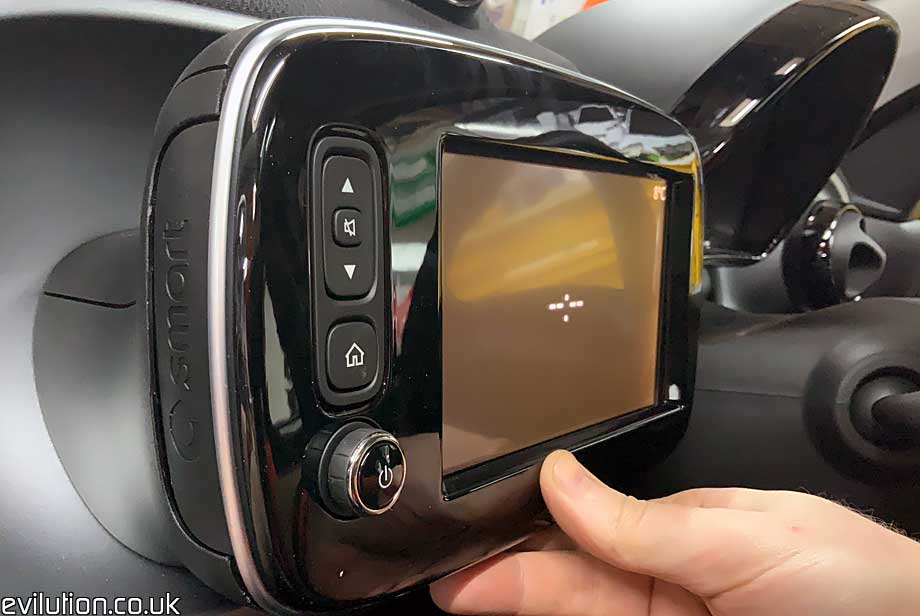
![](/wp-content/uploads/smartsound/453/stereoremove/audioremove8.jpg)
Smart Media System
This is the upgrade media system that can be specified on your 453.
![](/wp-content/uploads/smartsound/453/stereoremove/mediaremove1.jpg)
Use a plastic spudger along the bottom between the silver ring and the rear housing.
![](https://www.evilution.co.uk/wp-content/uploads/smartsound/453/stereoremove/media1.jpg)
Pull it from underneath as there’s plastic hooks along the top.
![](https://www.evilution.co.uk/wp-content/uploads/smartsound/453/stereoremove/media2.jpg)
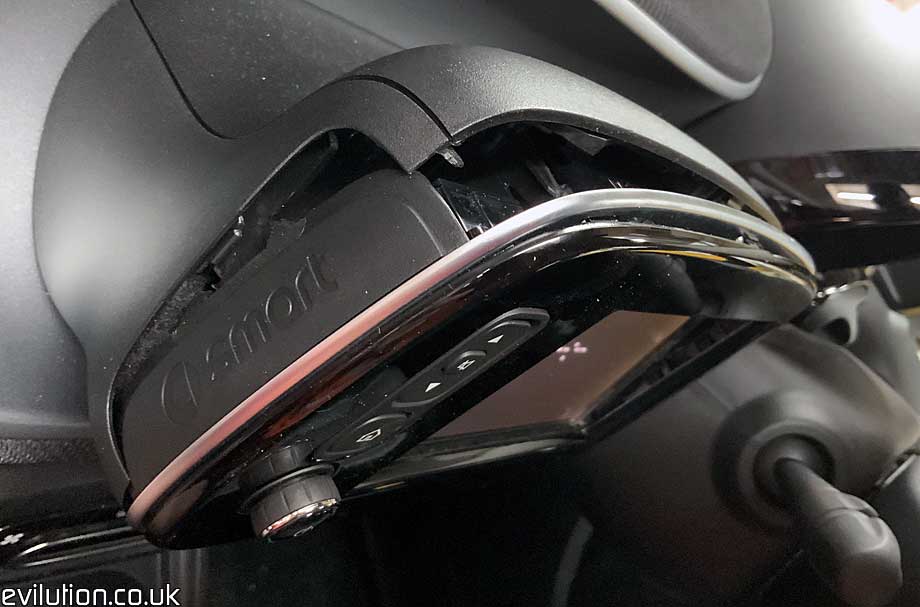
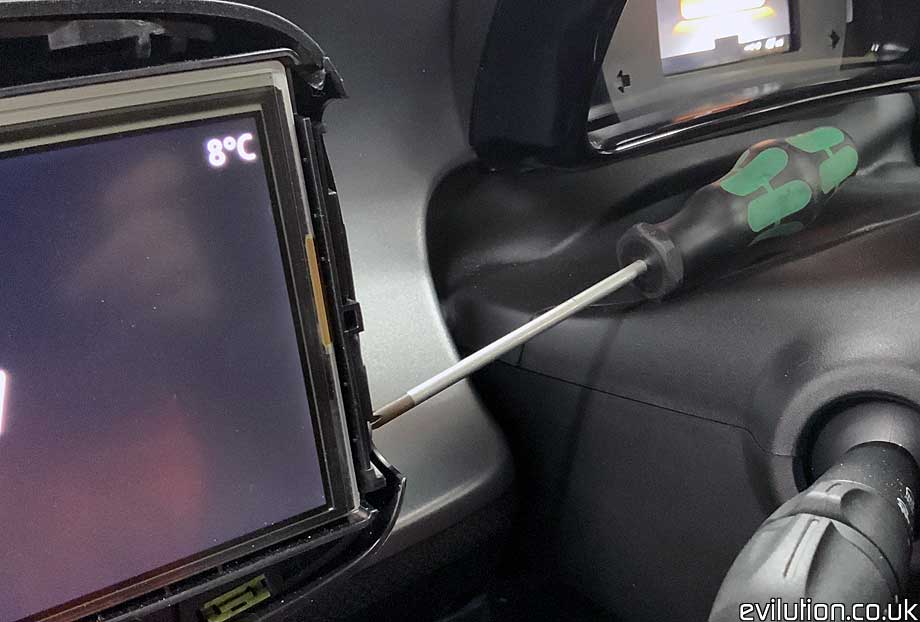
Lower the front down…
![](https://www.evilution.co.uk/wp-content/uploads/smartsound/453/stereoremove/media3.jpg)
…and disconnect the face plate.
![](https://www.evilution.co.uk/wp-content/uploads/smartsound/453/stereoremove/media4.jpg)
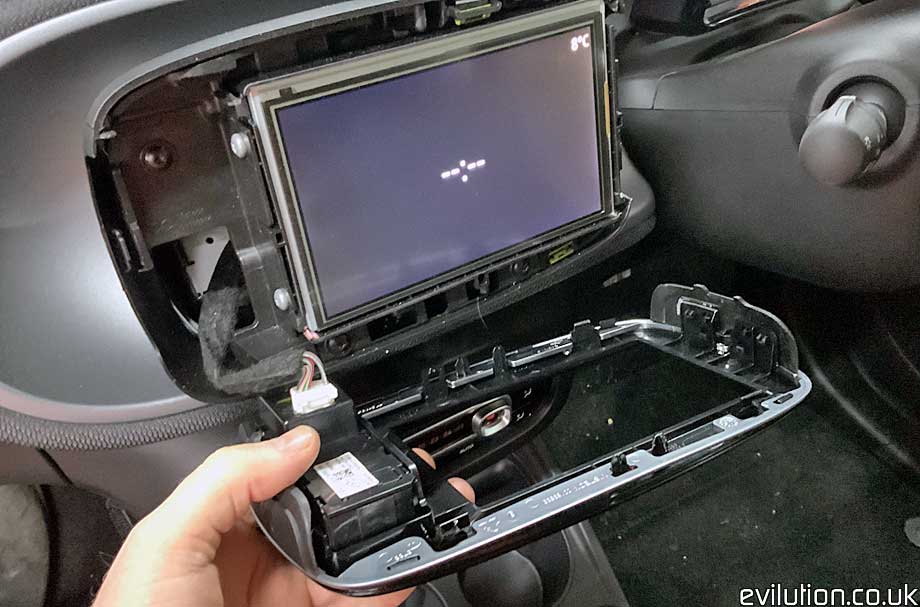
There are 4x Torx20 screws, 2 on each side.
![](https://www.evilution.co.uk/wp-content/uploads/smartsound/453/stereoremove/media5.jpg)
The driver’s side is a bit tricky because of the access.
![](https://www.evilution.co.uk/wp-content/uploads/smartsound/453/stereoremove/media6.jpg)
I found that lowering the steering column all the way down gave just enough access to remove them.
![](https://www.evilution.co.uk/wp-content/uploads/smartsound/453/stereoremove/media7.jpg)
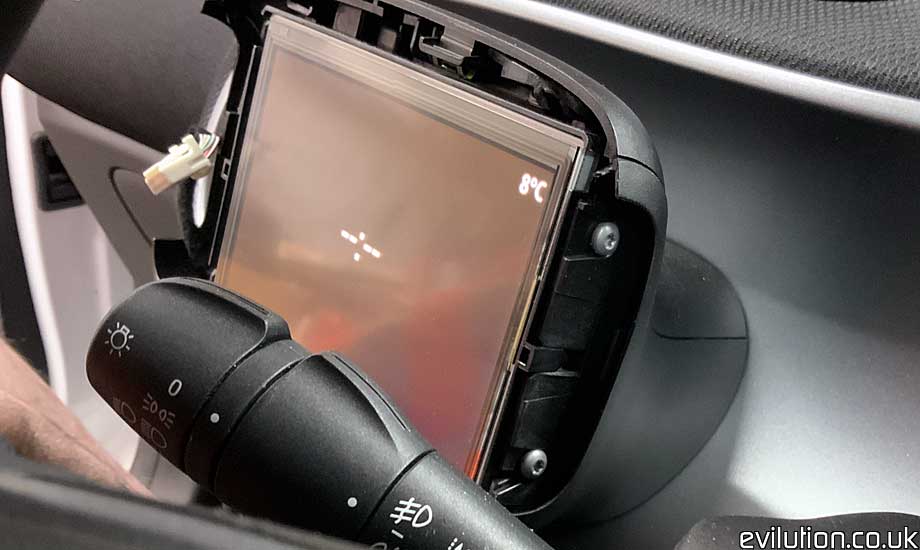
Pull the screen clear…
![](https://www.evilution.co.uk/wp-content/uploads/smartsound/453/stereoremove/media8.jpg)
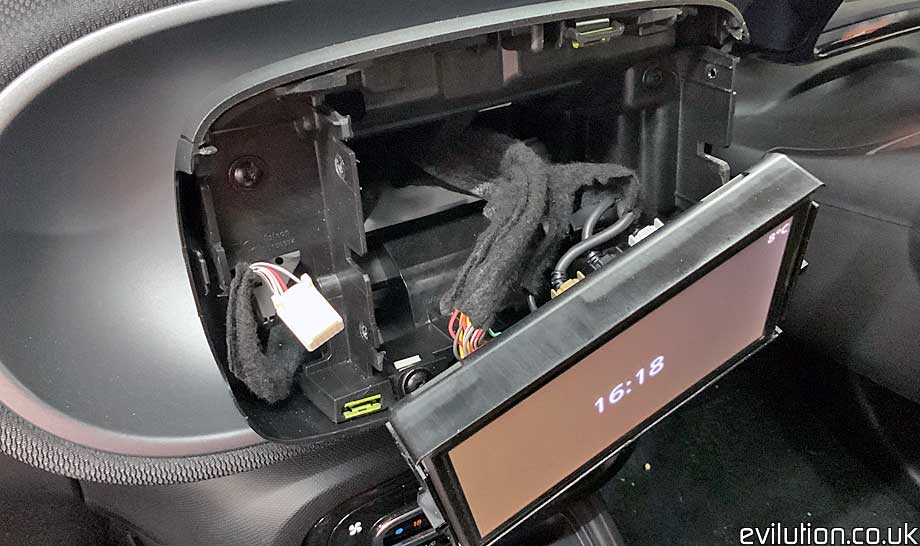
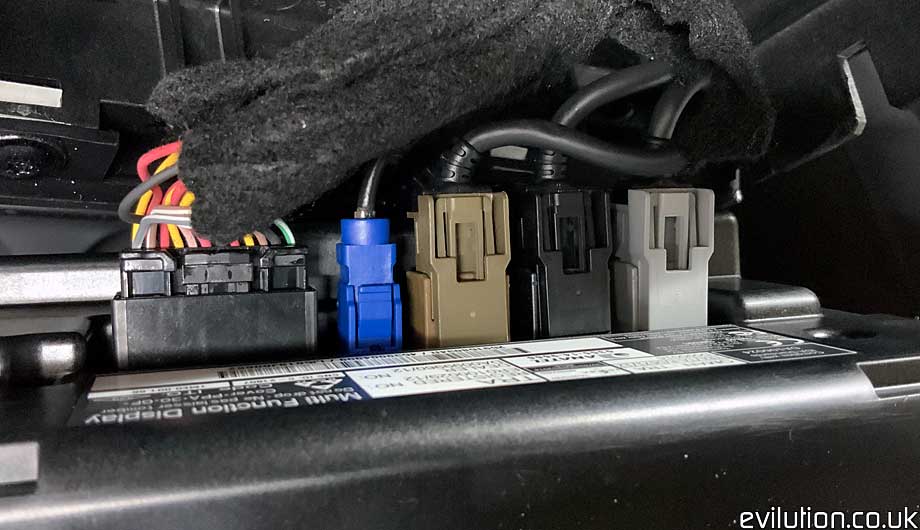
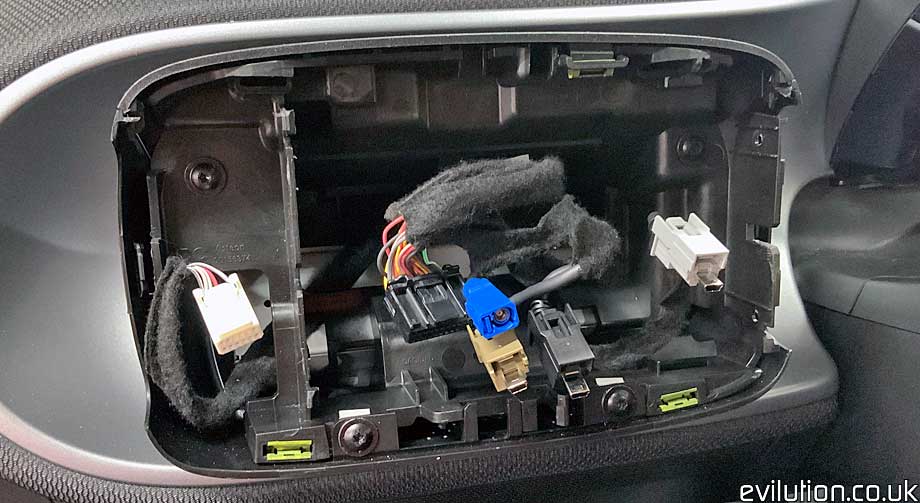
…look down the back and disconnect all of the connectors.
![](https://www.evilution.co.uk/wp-content/uploads/smartsound/453/stereoremove/media9.jpg)
Cool.
![](https://www.evilution.co.uk/wp-content/uploads/smartsound/453/stereoremove/media10.jpg)
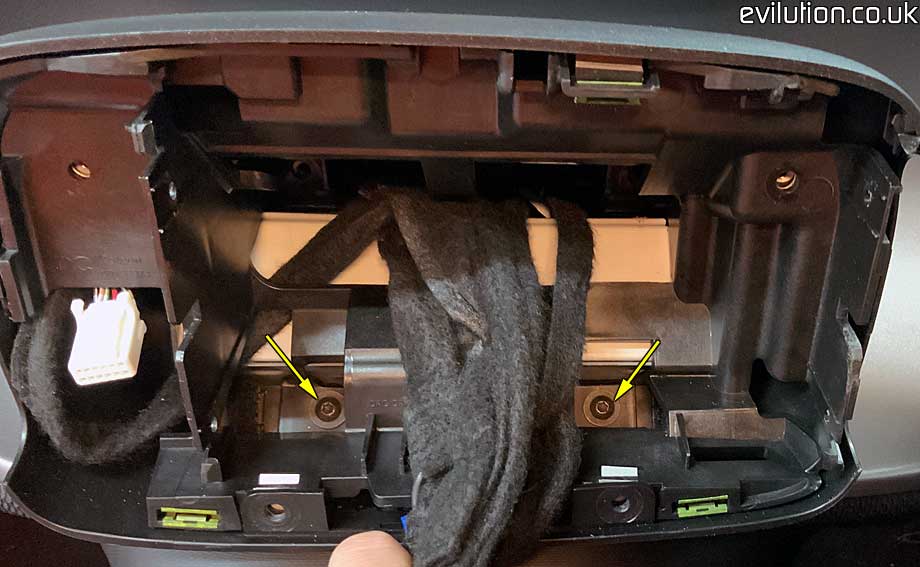
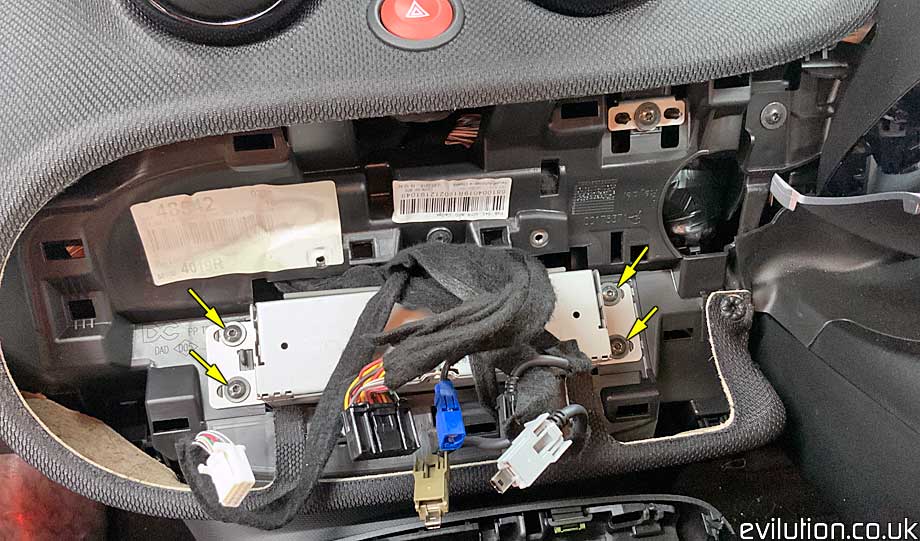
Look in the back of the housing, there are 4x Torx20 screws. 2 at the top…
![](https://www.evilution.co.uk/wp-content/uploads/smartsound/453/stereoremove/media11.jpg)
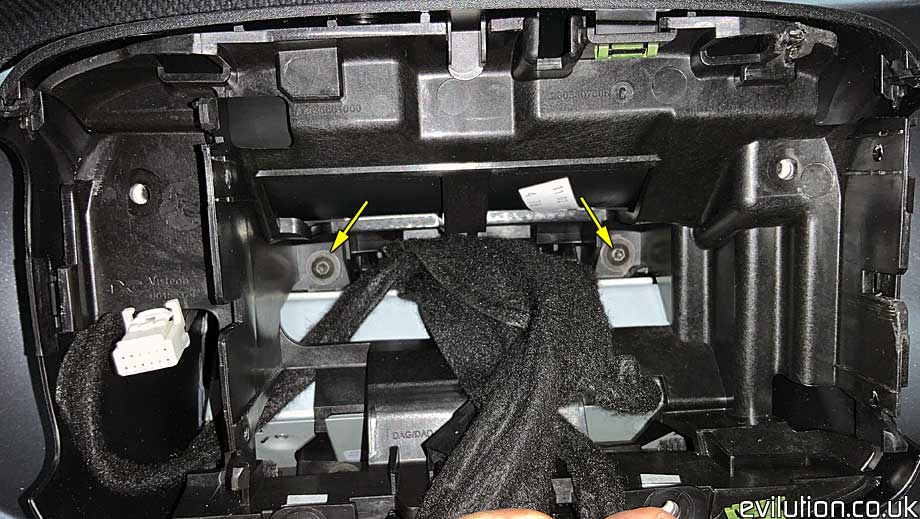
…and 2 at the bottom. Use a magnetic screwdriver because it’s easy to drop these.
![](https://www.evilution.co.uk/wp-content/uploads/smartsound/453/stereoremove/media12.jpg)
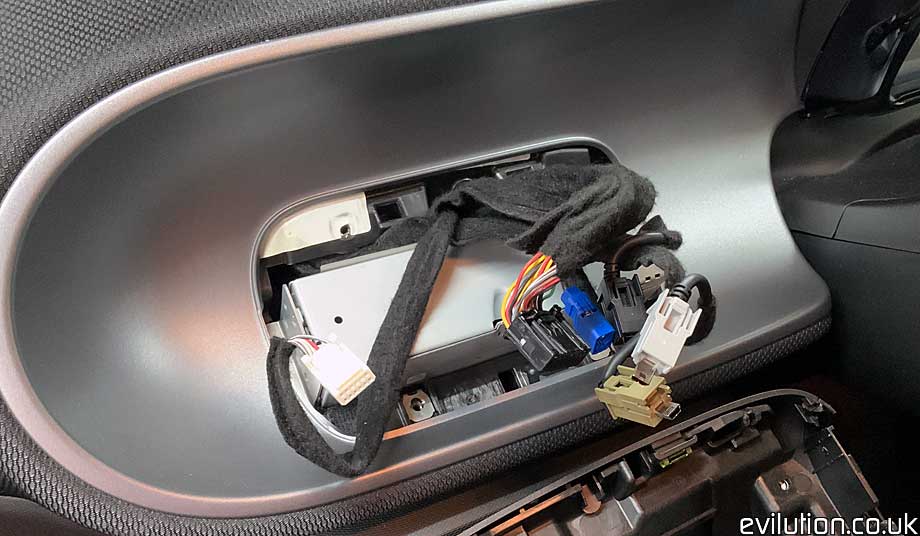
Pull the housing from the dashboard.
![](https://www.evilution.co.uk/wp-content/uploads/smartsound/453/stereoremove/media13.jpg)
Use the spudger to unclip the dashboard trim, grab and pull.
![](https://www.evilution.co.uk/wp-content/uploads/smartsound/453/stereoremove/media14.jpg)
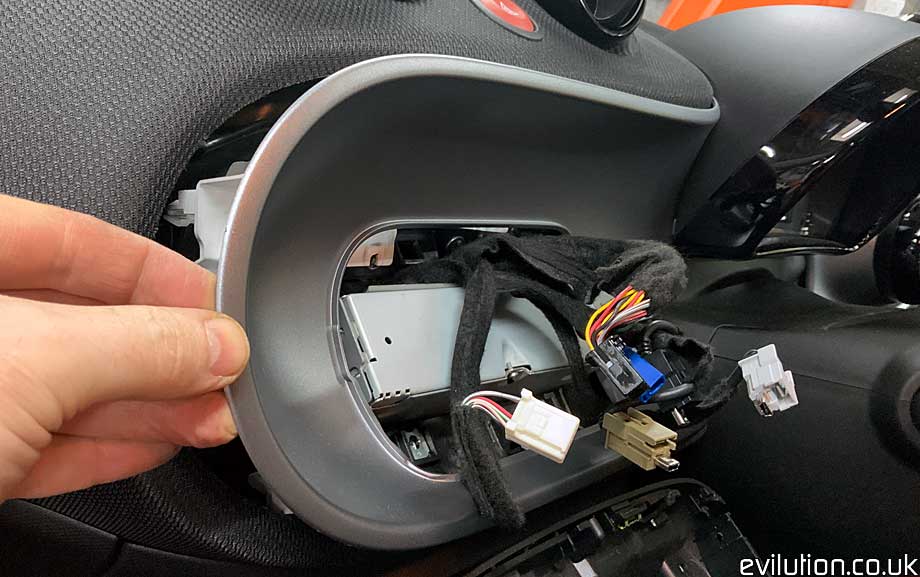
This reveals the stereo control box. Remove the 4x Torx20 screws…
![](https://www.evilution.co.uk/wp-content/uploads/smartsound/453/stereoremove/media15.jpg)
…and then slide the controller out.
![](https://www.evilution.co.uk/wp-content/uploads/smartsound/453/stereoremove/media16.jpg)
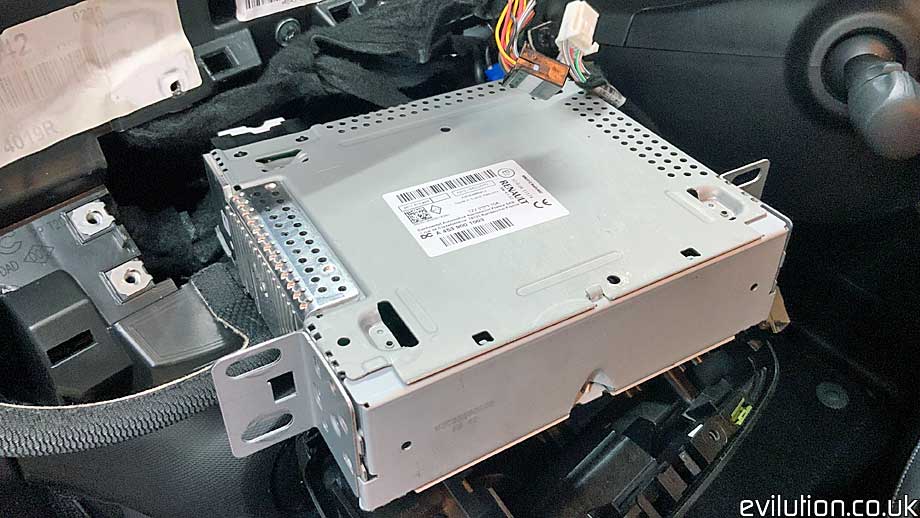
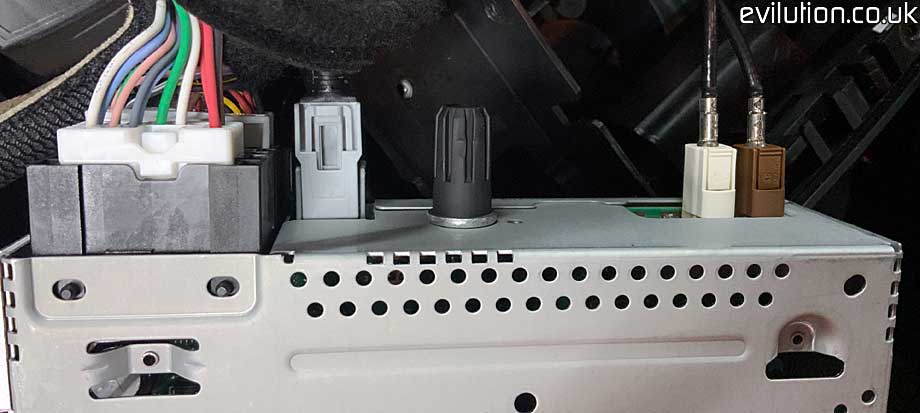
Disconnect all of the connectors and the controller is free from the car.
![](https://www.evilution.co.uk/wp-content/uploads/smartsound/453/stereoremove/media17.jpg)
When refitting the front panel, clip in the top hooks before pushing the bottom of the trim in place.
![](https://www.evilution.co.uk/wp-content/uploads/smartsound/453/stereoremove/media18.jpg)
Refitting The Trim
You don’t have to remove the speedo if you know about the angle and the wiggle.