

Mod Description
Arjan contacted me in July 2012 to show me a mod he had completed with his X-Gauge and I knew I had to feature it.Mod Details
PremiumYes Difficulty
 Mod ID372
CreditArjan Haverkamp
For
Mod ID372
CreditArjan Haverkamp
For
 Linkhttps://www.evilution.co.uk/mod/x-gauge-rear-view-mirror.htm Copy to Clipboard
X-Gauge Fitted In A Rear View Mirror
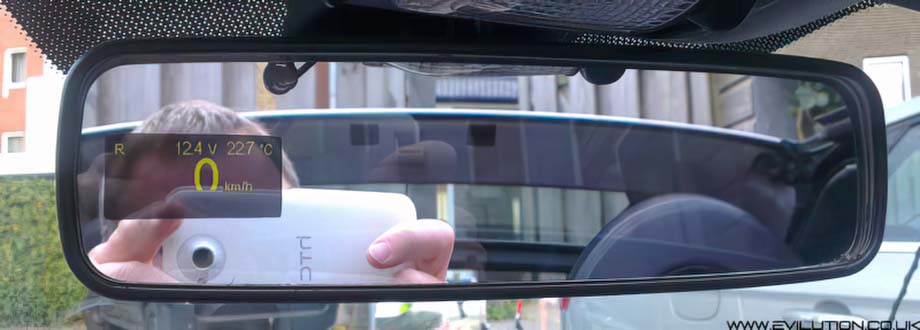
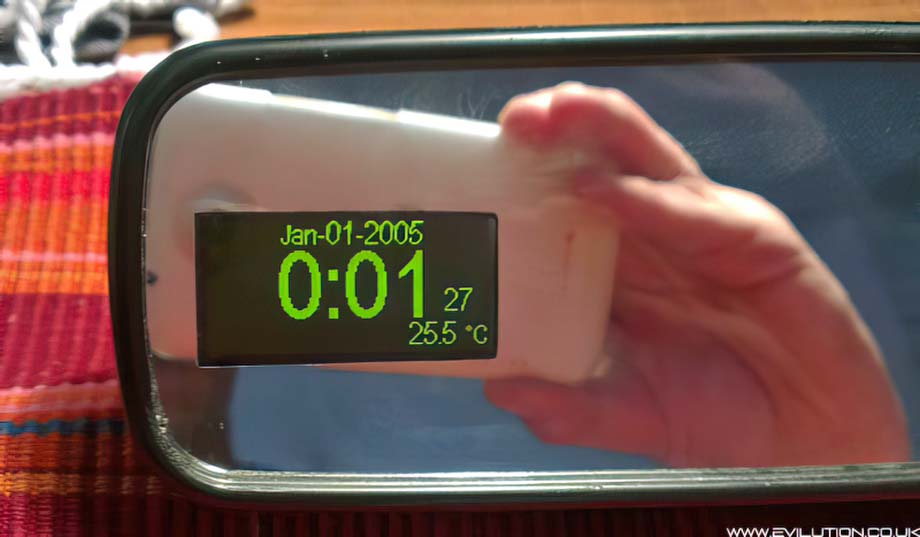
I have to start with a picture of the finished article as it look amazing.
Because of the narrow restrictive view of the rear view mirror in the smart range, it is very easy to readjust the mirror so the far 3/4 of the mirror sees out the back. If you place the screen on the driver’s side of the mirror, when adjusted to see out the back, you will see some of your face. So for you ugly smart owners, maybe place the screen on the passenger’s side.
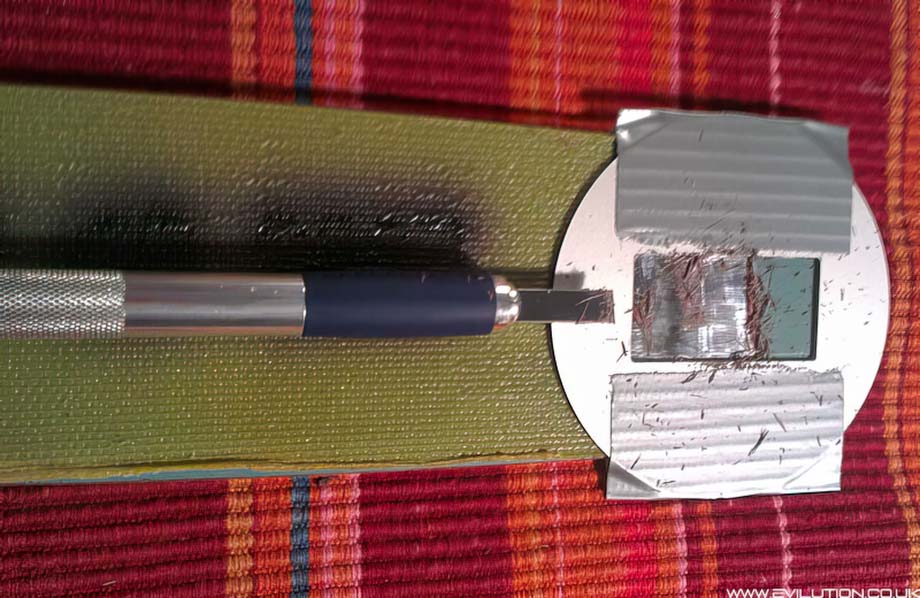
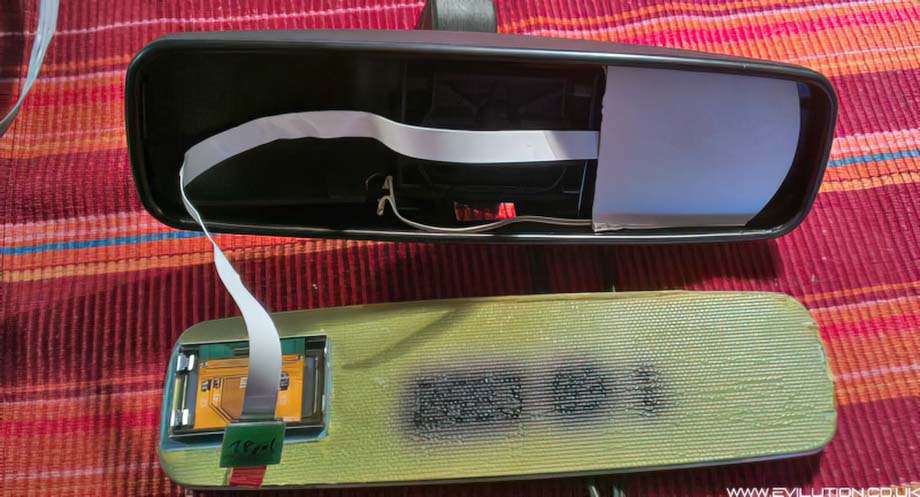
With the rear view mirror open, you will see that the back of the mirror has a heavy duty adhesive tape on it. You need to carefully cut and remove a section of this tape so that the X-Gauge screen can sit flush against the glass. Then take the pod face, place it onto the rear of the mirror and tape it down. Use a razor blade to cut around the inside of the hole and then carefully scrape off any of the grey backed reflective material.
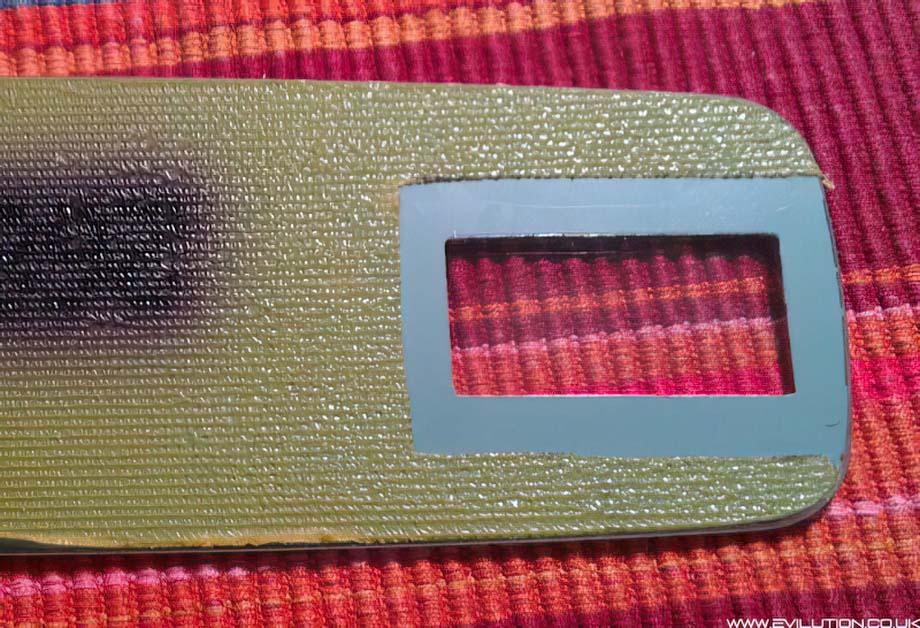
Un-tape the pod face and you should be left with this.
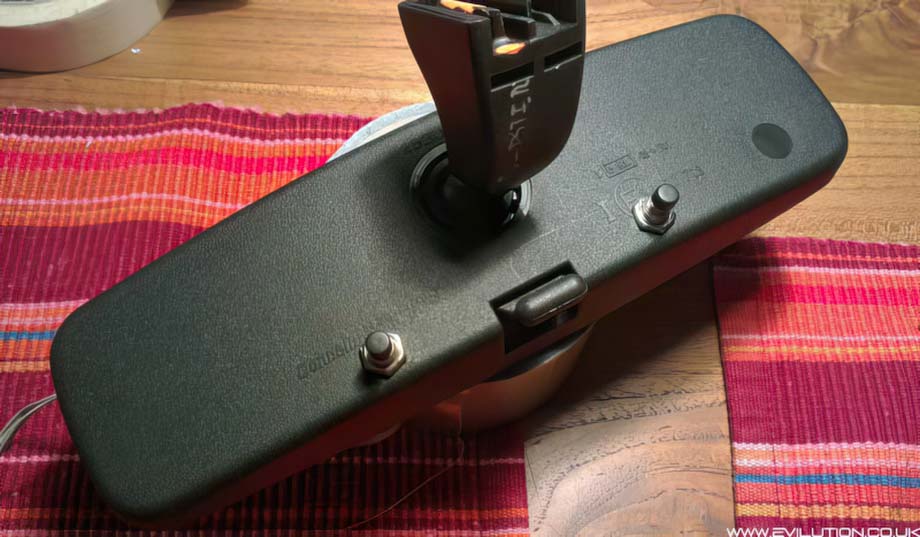
So the X-Gauge parameters are still adjustable, Arjan drilled out the back of the mirror and placed 2 momentary push buttons in place, these are soldered to the original X-Gauge buttons.
The screen was then held in place with double sided adhesive tape, the screen cable extended, the PCB stuck in place and covered up with cardboard to prevent any short circuiting. There are 6 cables from the X-Gauge PCB, 3 to the dash-top button bank and 3 to the OBD port. Make a hole in the top of the rear view mirror for these cables to come out of. These cables will be hidden behind the roof and pillar trim so you will need to extend these wires to reach.
Check it all works and then refit the mirror section.
Fit the mirror in place, run and hide the wires and plug everything in. Set the parameters you require on the X-Gauge and you are done.
By far the best X-Gauge mounting option I have seen.
Screen Extension Cable
This can be bought from LC Design, Click here.
Look over on the left menu and click on ‘Flexfolien und Adapter’. A new menu will open, click on ‘Verlängerungen’ Select the 100mm long version from the main page and select the 18 Polzahl option.
The part number is V05-18-100. They also do a 200mm long version which is V05-18-200.
It really depends on where you are going to put the X-Gauge PCB, that wil determine how long the extension cable is that you need.

Translations And Info
Flexifolien = Flexible foil
Verlängerungen = Extension
bis 18 pol = To 18 pole
They speak English and take Paypal so there should be no problem ordering from them.
How To Open Your Rear View Mirror
This is something I looked into quite a lot at one stage. My original idea was to place a tiny Sat-Nav in there but the idea lead on to a GPS antenna, a clock and an in car camera.
I tried quite a few ways to get the mirror apart. It was only when I cut a mirror shell in half I realised that they are moulded with the mirror in position so figured that it wasn’t possible to remove the mirror once the shell was formed around it. I was glad to be proved wrong and after being given a a single piece of information I was amazed how easily I could get the mirror apart.